Page 1 of 2
Akers Barnes
Posted: Sat Aug 16, 2008 8:43 am
by Luse
Well guys, looking around and seeing everyone having a pit,
I have decided to make my own !.
It will be an AB, small, cheap but none the less I hear a simple pit is better than no pit at all

It will be all dressed up with paint and Decals of course

So I should start purchasing wood and building within the next Two Or Three Days

Any Hints or Tips as far as Building or Anything of that sort ?
Will be greatly appreciated!
-Luse
Posted: Sat Aug 16, 2008 3:07 pm
by Gunner
Luse, the one suggestion I would make is to go ahead and glue everything together, unless you need to have it portable. I'm sure Rock, Red, and Thumper (who all use AB pits) will back me up...you want the thing to be as solid as possible.

Posted: Sat Aug 16, 2008 11:15 pm
by Metro
Here is a link I found that has the panels for the F-16 exactly to size.
http://perso.wanadoo.fr/animationmaster ... 0C6_01.zip
I just simply downloaded them and hit print on my computer. Someone else did all the "sizing work" works great and I have started the processes of producing my panels. If you are just using them as decals, It is a no brainer. Just cut and glue. If you cant get them off the link. Send me your e-mail and I will send you the file. I downloaded them and have them now.
Metro
Posted: Sun Aug 17, 2008 12:42 am
by Rock
Luse building a pit will be one of the best things that you can do for Virtual Formation flying and flight simming in general. The Aker Barnes has been terrific. It's cheap and fairly easy to build.
Before you start have a real good look at the plans. There is a couple of different seating positions depending on how much incline you want. Also, before you paint it put it together and see how it fits. You might not want to paint the joints as it will become extremely tight.
The type of wood that you use isn't really that important. I used cheap plywood but of course the nicer grades will make the finished product that much smoother and better to look at.
When you get it all done make sure and strap your stick down. I used tie straps and you might need to drill some holes for them to go through. Also, as Gunner said you can either glue it or what I did was built reinforcement brackets to hold it tighter together. This way I can still take it apart if I ever need to.
Good luck and happy building! It will be well worth it.
Posted: Sun Aug 17, 2008 1:07 am
by Luse
Thank you all for the replys !
Gunner: Thank you, However it is going to have to be portable

Metro: Awesome Man, I will certainly be using these, Thank you Man
Rock: I must say I was worried about that, From most of the pictures I have seen the seat positions seem fairly inclined, I was wondering if this takes time getting used to ? and what your Ideas are on how much, or if its just your own preference.
For the building material I was told the same thing you have told me, I do plan to paint it, so as far that goes I much rather have performance then good looks. ( Even though I do plan for both
)
As for stick I am going to use tie-straps, along with building a small area for the base of the stick to " Sink " into, so that the Base of the X52 is flush with the wood, along with some other modifications to accommodate the Occasional Drink ( Non Alcoholic Of Course

)
Posted: Sun Aug 17, 2008 7:22 am
by Lawndart
You should mount the stick at a height that puts the bottom of the handle on the stick level with your elbow when sitting down. In other words, with your hand on the stick, the lowest position of your hand should roughly equal the height of your elbow. This will be most comfortable in the long run. Also, if you were building an ACES II (just for reference) it would also closely match where your knees are in relation to the bottom of the stick handle.
Just a little comfort tip over cosmetics. We don't want you to develop tendonitis or carpel tunnel like so many before you...
Posted: Sun Aug 17, 2008 3:00 pm
by Luse
Ahh will do,
A wise man once said, listen to they who fly inverted
Posted: Sun Aug 17, 2008 6:15 pm
by STRIKER
Well said my friend... well said.
Posted: Mon Aug 18, 2008 6:30 pm
by Thumper
Gunner wrote:Luse, the one suggestion I would make is to go ahead and glue everything together, unless you need to have it portable. I'm sure Rock, Red, and Thumper (who all use AB pits) will back me up...you want the thing to be as solid as possible.
Actually, I would reccomend going with a good grade of wood (3/4" AC plywood) and take time to cut your slots where the pit joins together accurately and with fairly tight tolerances. Rather than using glue, I picked up some small 90 degree angle brackets and screwed certean parts of the seat and tabletop together. If I need to move it all I have to do is take out a few screws to disassemble it and the brackets and the heavier grade of wood make it rock solid.
Just my .02.
Posted: Mon Aug 18, 2008 8:21 pm
by Luse
Thanks Thump,
I was thinking the same thing with the slots.
As far as the wood goes, does it matter what type, Oak ect ect. ?
Oh and I decided how it will be painted

tis a secret
Posted: Mon Aug 18, 2008 9:19 pm
by Thumper
The only reason it would matter is if you are going to finish the pit using a stain rather than painting it. The most important thing is that you get plywood that is sanded on both sides. That way you have a nice smooth surface to start off with. You can even use mdf if you're planning on painting. Make sure you seal/prime the wood before you paint otherwise you'll end up using more coats of paint than necessary to cover and you might cause the the grain to raise up or bubble, especially with a water based paint.
Take a look at your local Home Depot or Lowe's at what's available and when you see the prices the decision making process will become easier. You should be able to cut everything out using 2 4x8 sheets of plywood. Remember, using thicker wood means you will have to change measurements, the centers of the slots should be in the same position, but the width of the slots will change to accomodate the thicker material. Also, there was an option in my plans for wider sideboards (that your controls will sit on) and I highly recommend using them.
Take your time measuring and cutting, if you make mistakes you'll be running to the store for more plywood and your project cost will go up significantly.
Here is a pic of mine:
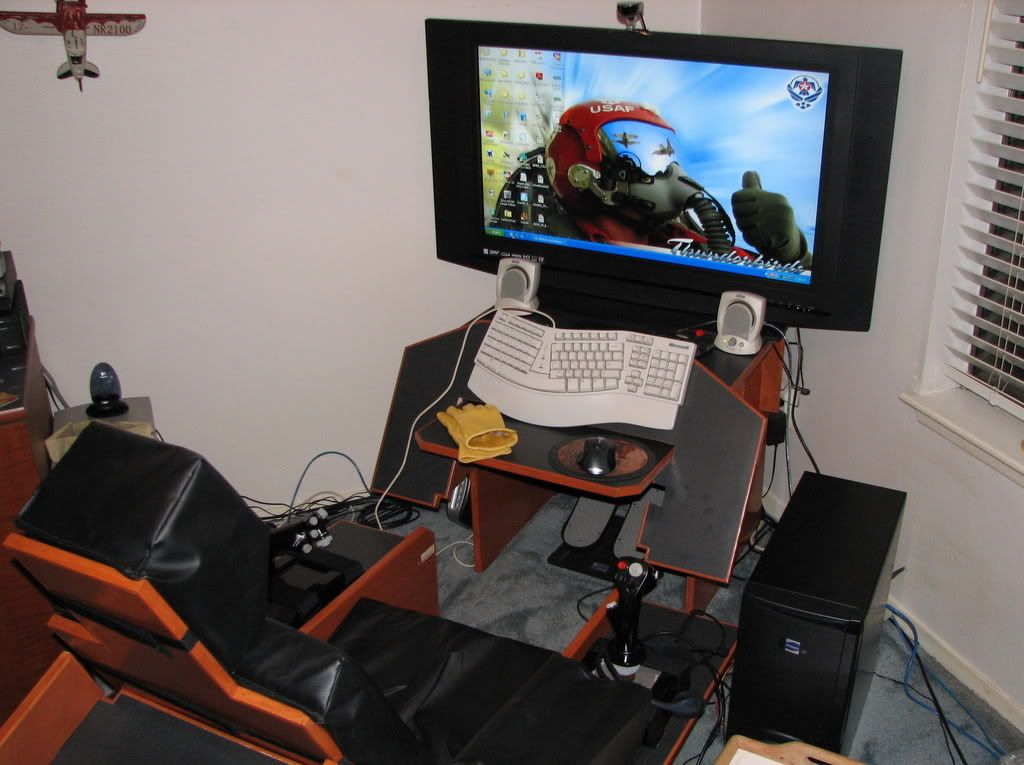
As you can see I stained mine and used formica laminate on most of the flat surfaces where you would put your hands to keep the finish from getting mucked up. It also matches my computer desk in the office.
Posted: Mon Aug 18, 2008 11:24 pm
by Luse
Posted: Tue Aug 19, 2008 1:51 am
by Rhino
Thump is that where you play CoD from? No wonder you camp so much!
Posted: Tue Aug 19, 2008 7:22 am
by Luse
It's kinda hard to stay awake I would presume. That thing looks so comfy a man could take a nap!
Posted: Tue Aug 19, 2008 10:24 pm
by Dagger
Hey Luse,
Here is the one I did and was telling you about.
